How to Improve Your Jenkins Builds with Shared Libraries - Altimetrik

What is a Shared Library?
A shared library in Jenkins is a reusable collection of Groovy scripts that can be used by multiple Jenkins jobs. This allows you to share code and functionality between different jobs, which can make your builds more efficient and easier to maintain.
To understand the concept of shared libraries, let’s consider a real-time example. Imagine you have multiple Jenkins pipelines that require a common set of functions for interacting with a version control system, such as Git. Instead of duplicating the Git-related code in each pipeline, you can create a shared library that encapsulates the necessary Git operations.
Folder Structure of Shared Library
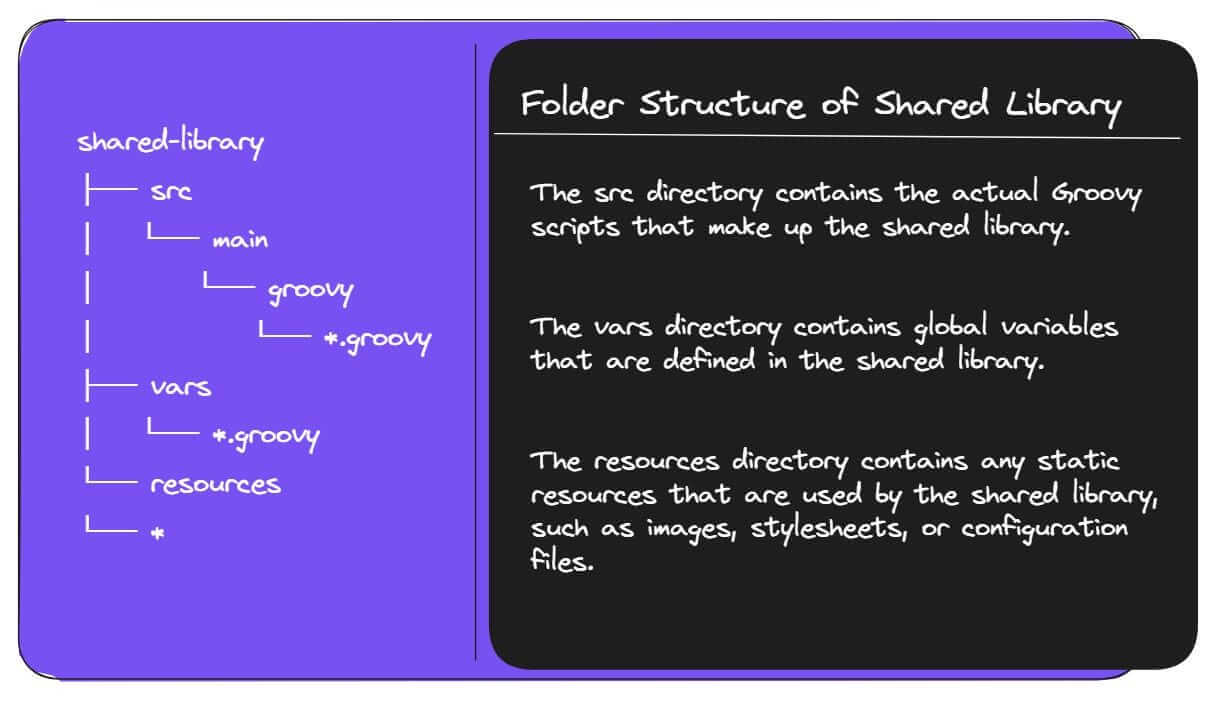
- The
srcdirectory is structured like a standard Java project. This means that you can use theimportstatement to import classes from other directories in thesrcdirectory. - The
varsdirectory is a special directory that contains global variables that are defined in the shared library. These variables can be accessed from any Jenkins job that imports the shared library. - The
resourcesdirectory is a regular directory that can contain any type of file. However, it is typically used to store static resources that are used by the shared library.
Steps to Configure Shared Library in Jenkins
Create a repository in any source code management tool.
Here we are using GitHub.
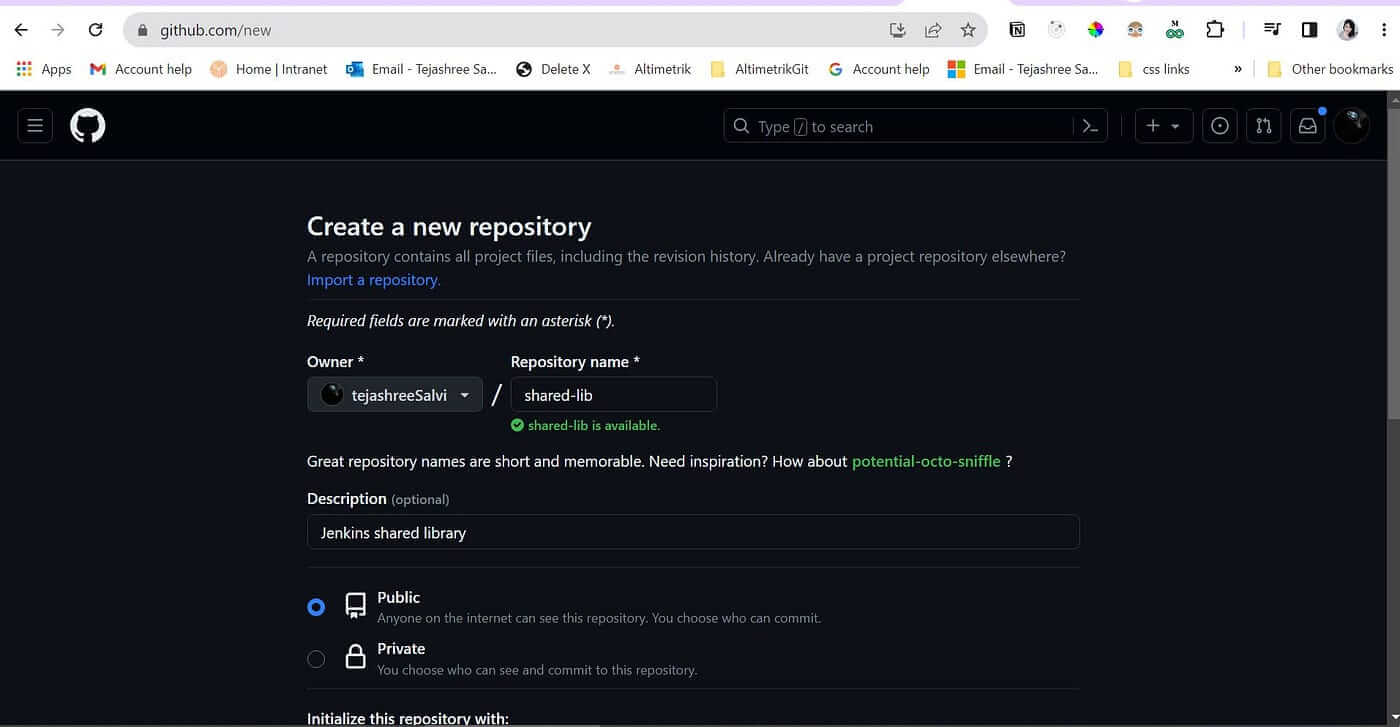
Clone the newly created repository
git clone https://github.com/tejashreeSalvi/shared-lib.git

Create a folder structure
We have created the vars directory in which we are going to write our reusable function.
Let’s consider a real-time example. Imagine you have multiple Jenkins pipelines that require a common set of functions for interacting with a version control system, such as Git. Instead of duplicating the Git-related code in each pipeline, you can create a shared library that encapsulates the necessary Git operations.
Creating your First Shared Library to checkout scm.
checkoutCode.groovy
- The
callmethod, which is a special method in Jenkins shared library that allows the function to be directly called from a Jenkins pipeline. ${env.WORKSPACE}assigns the Jenkins environment variableWORKSPACEshis used to execute a shell command to clone the repository in theworkingDirand checkout(switch) to the specifiedbranch.- the path
workingDiris returned to Jenkins Pipeline.
This piece of functionality can be reused in Jenkins pipelines that import and use the shared library.
Commit your changes to a Git repository.

The code is successfully pushed and available in the remote repository.
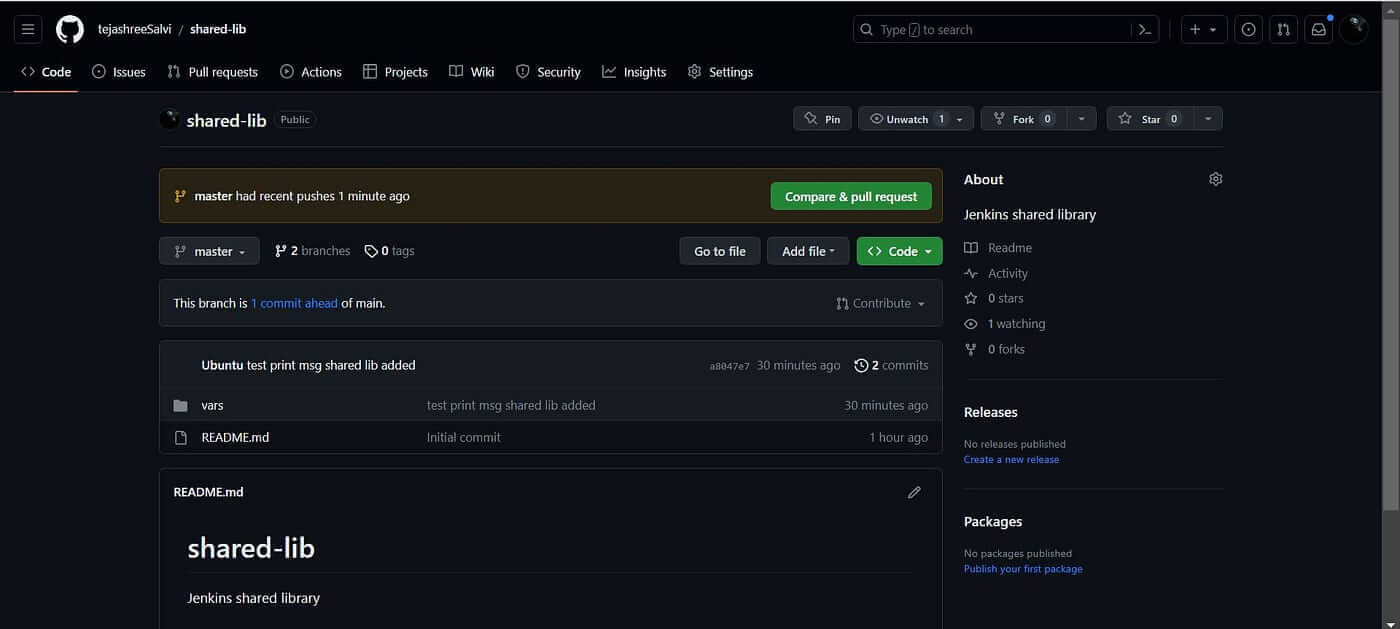
Configure the Global pipeline Libraries (Shared Library) in Jenkins
Login to Jenkins.
Go to Manage Jenkins → Configure System
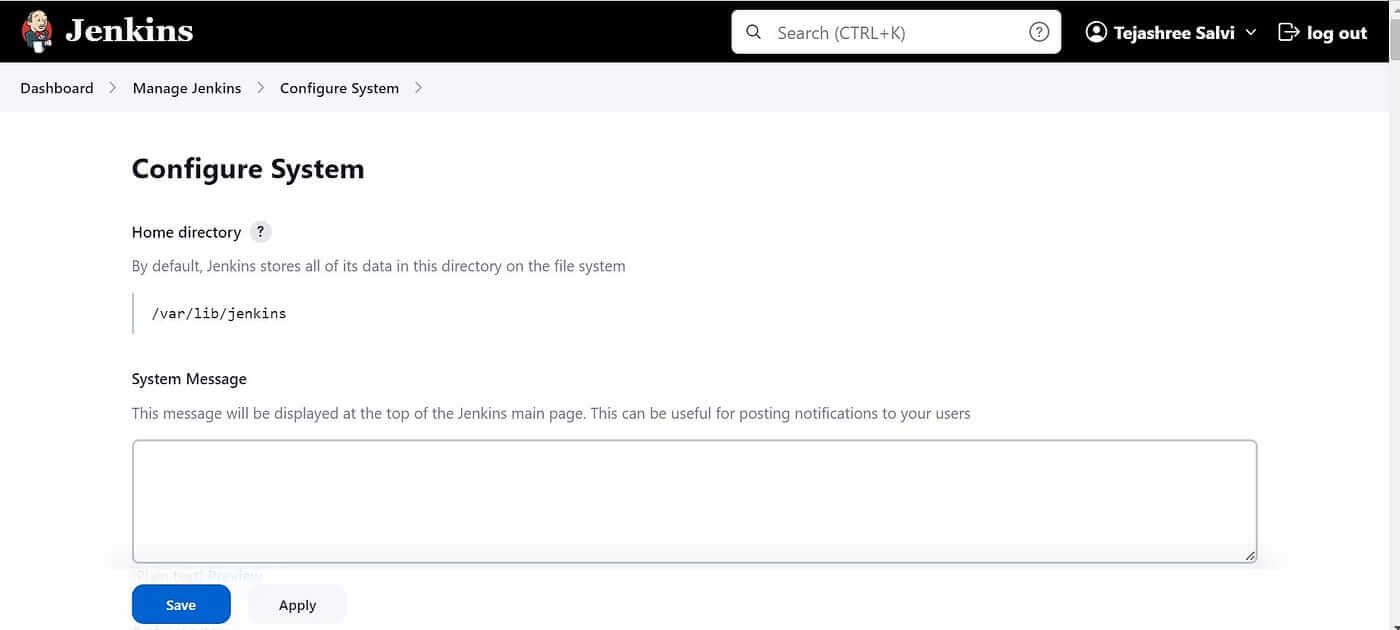
Next Step, Search for Global Pipeline Libraries and configure the parameters.
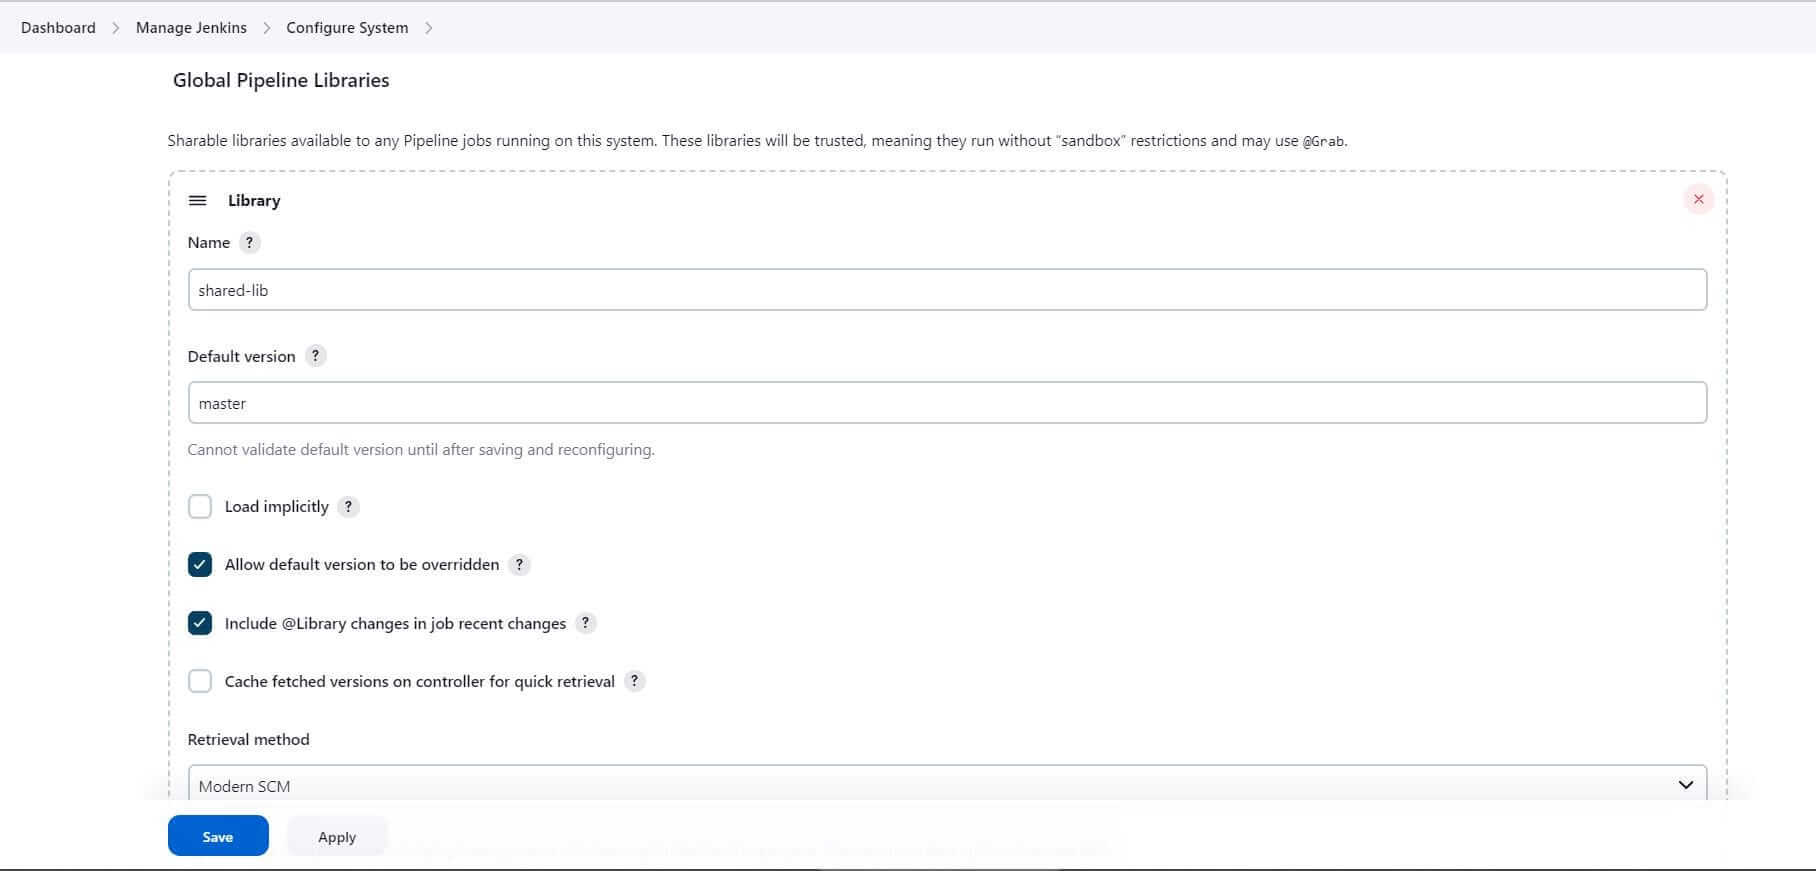
- Enter the Shared Library Name:
shared-lib - Set the default branch:
master(Jenkins will consider the default branch if no branch is specified while importing shared lib).
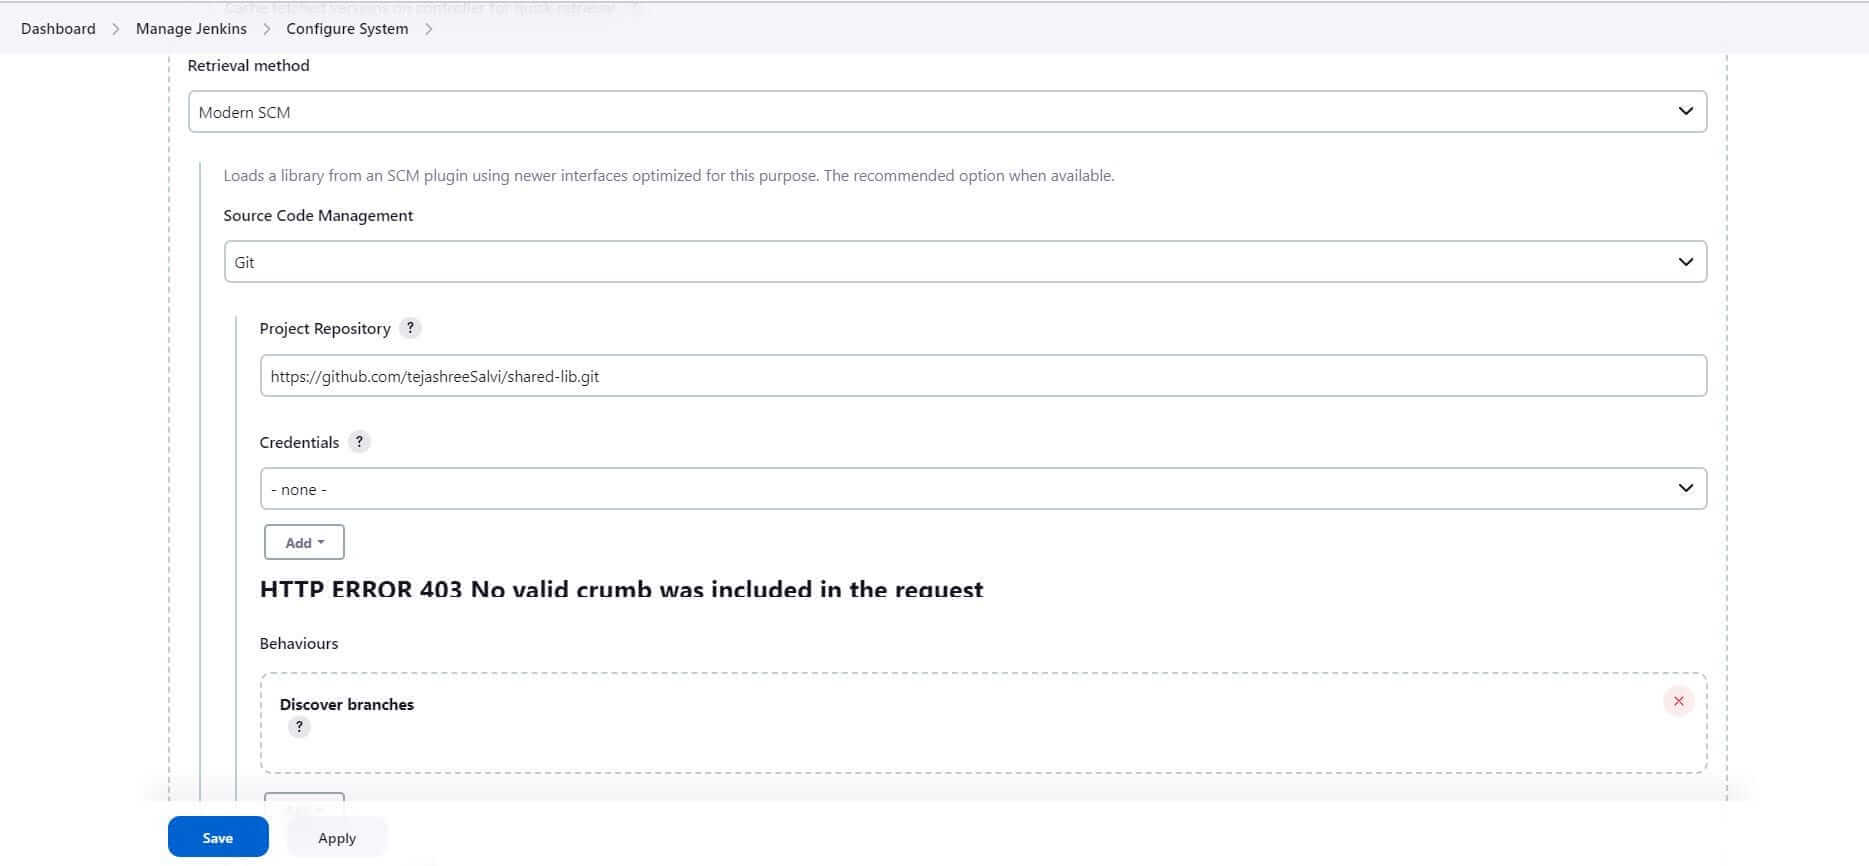
3. Configure the repository we created for Shared Library: https://github.com/tejashreeSalvi/shared-lib.git
GitHub – tejashreeSalvi/shared-lib: Jenkins shared library
4. Configure the credentials, if your repository is private
5. Click Save
WoW! we are done with configuration part.
Let’s use the shared library in pipelines
To Import the library we use the @Library annotation and specify the library name defined in the Jenkins Global Configuration.Create a Jenkins pipeline
Go to New Item and give a suitable pipeline name first-shared-lib-pipeline and Type pipeline
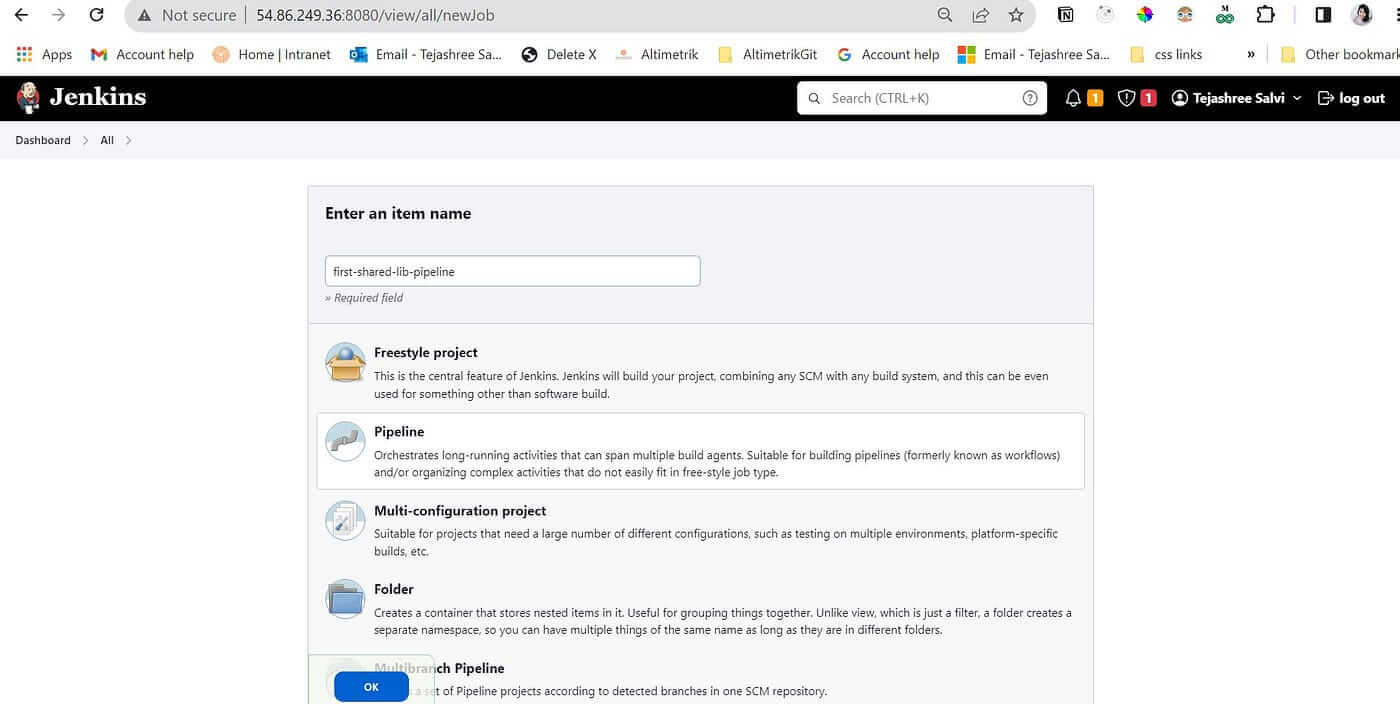
Click on OK
Script to Import the Shared Library
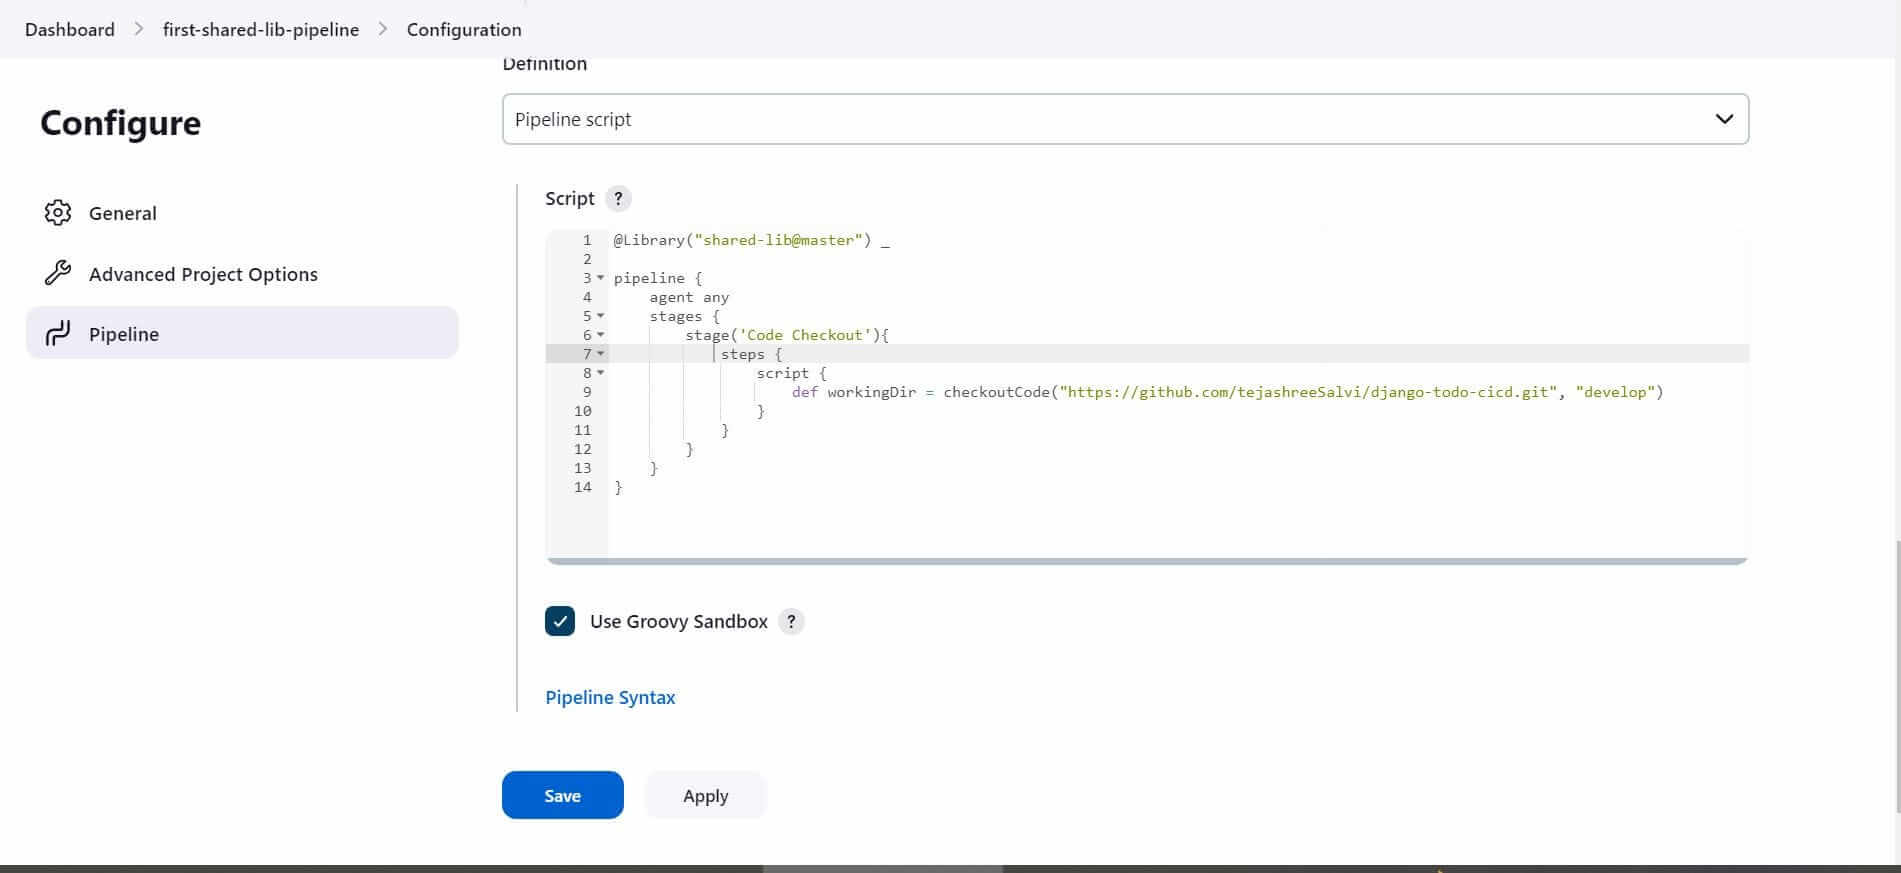
Go to Pipeline Script→ Add the Script and Save@Library(“shared-lib@master”) _
@Library("shared-lib@master") _: this will import the shared library named “shared-lib” at the “master” branch. The library is made available for use in this Jenkins pipeline.
2. def workingDir = checkoutCode("https://github.com/tejashreeSalvi/django-todo-cicd.git", "develop"): This line calls the checkoutCode function from the shared library, passing the repository URL and Branch name.Hence you can create multiple pipelines and use the checkoutCode function from a shared library to checkout scm. Instead of writing the block of code again and again in all the Jenkins pipelines.
Build the Pipeline.Go to first-shared-lib-pipeline → Click on Build Now
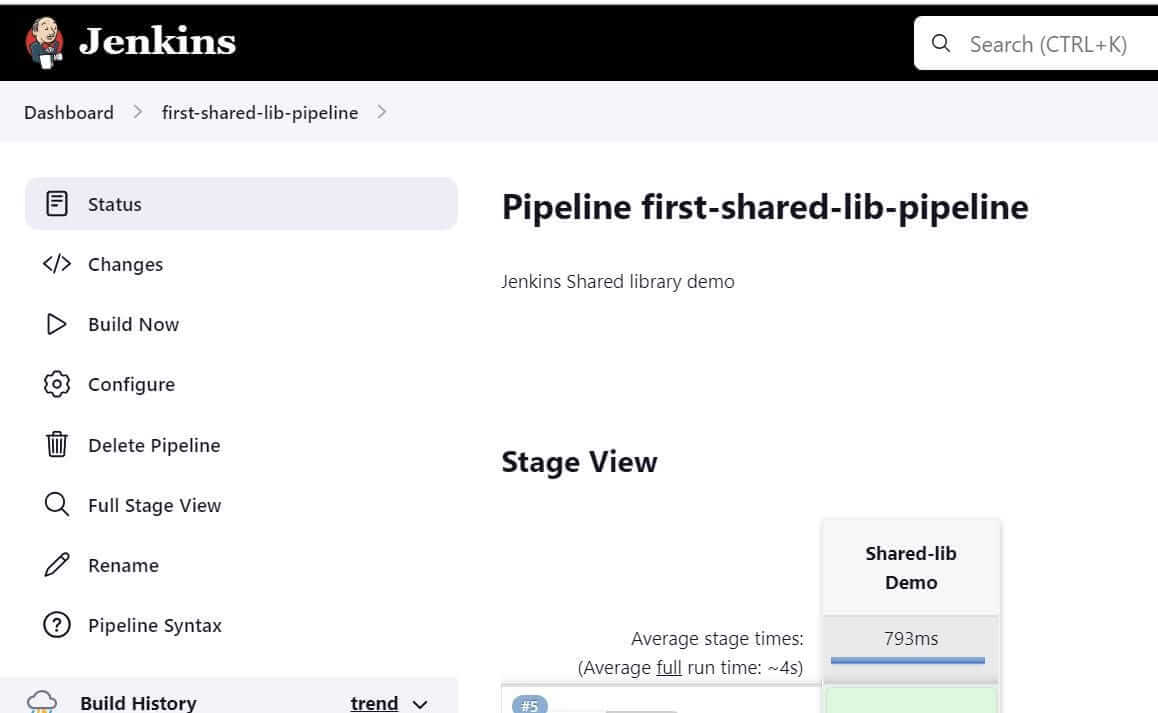
The build will be triggered. Check the console output of the build.
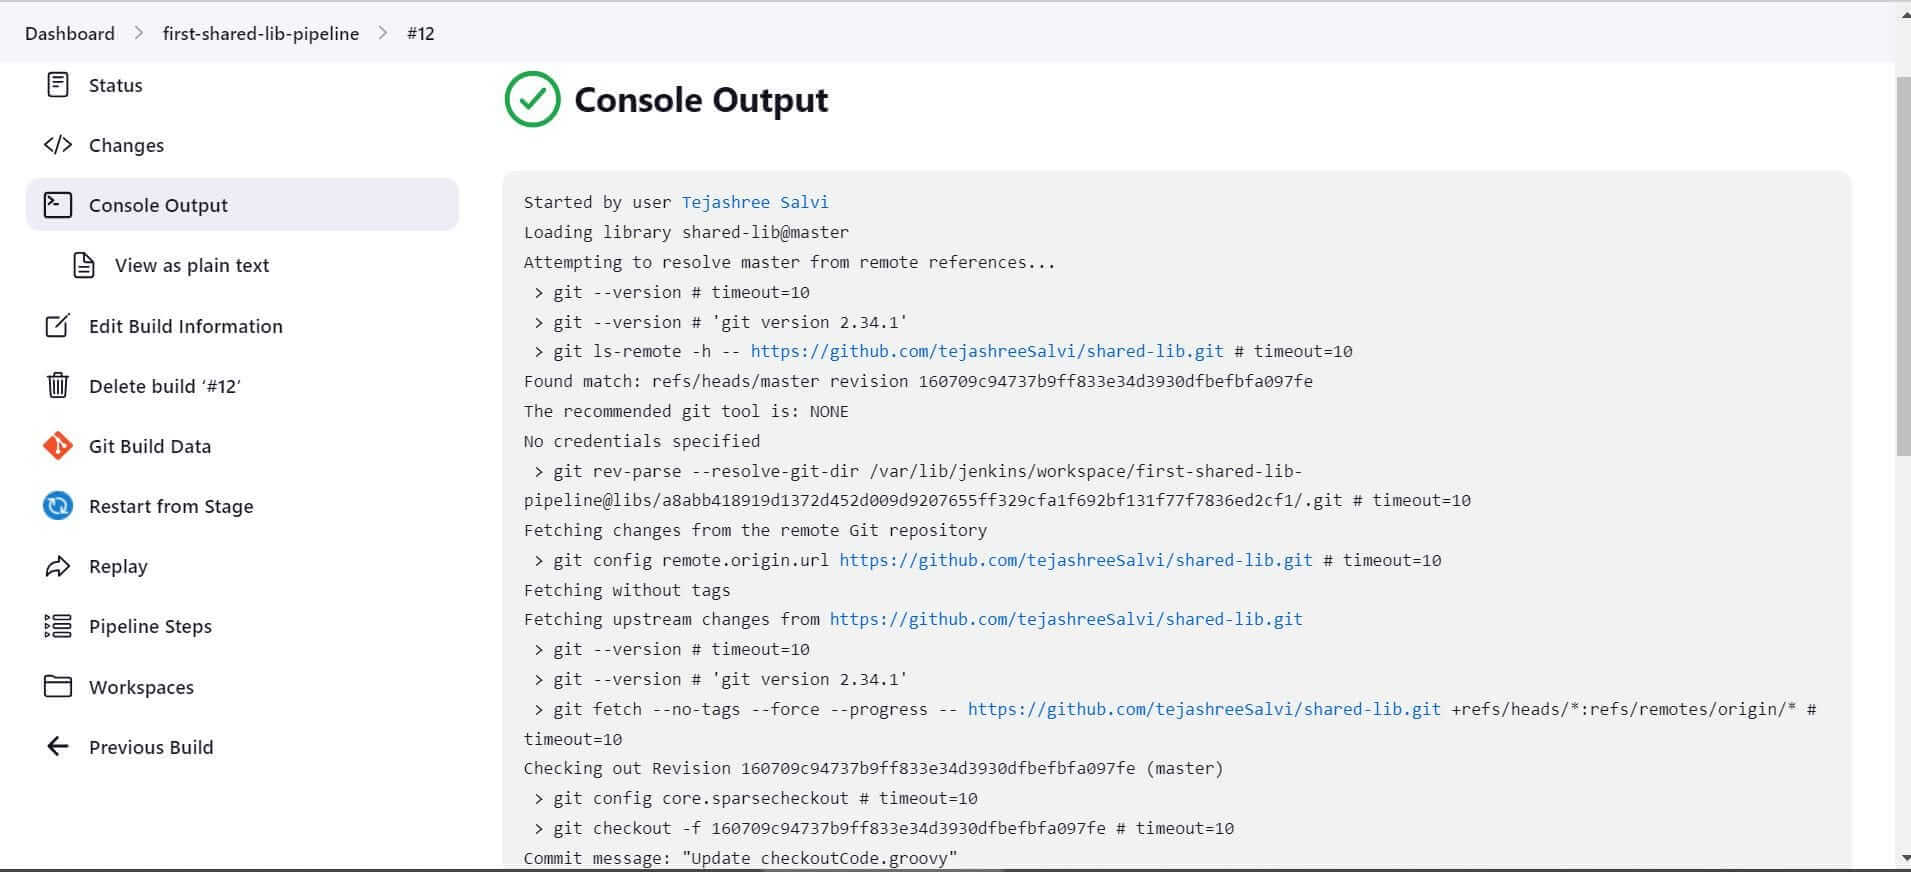
If you look closely, you will find that the Shared library was loaded successfully.
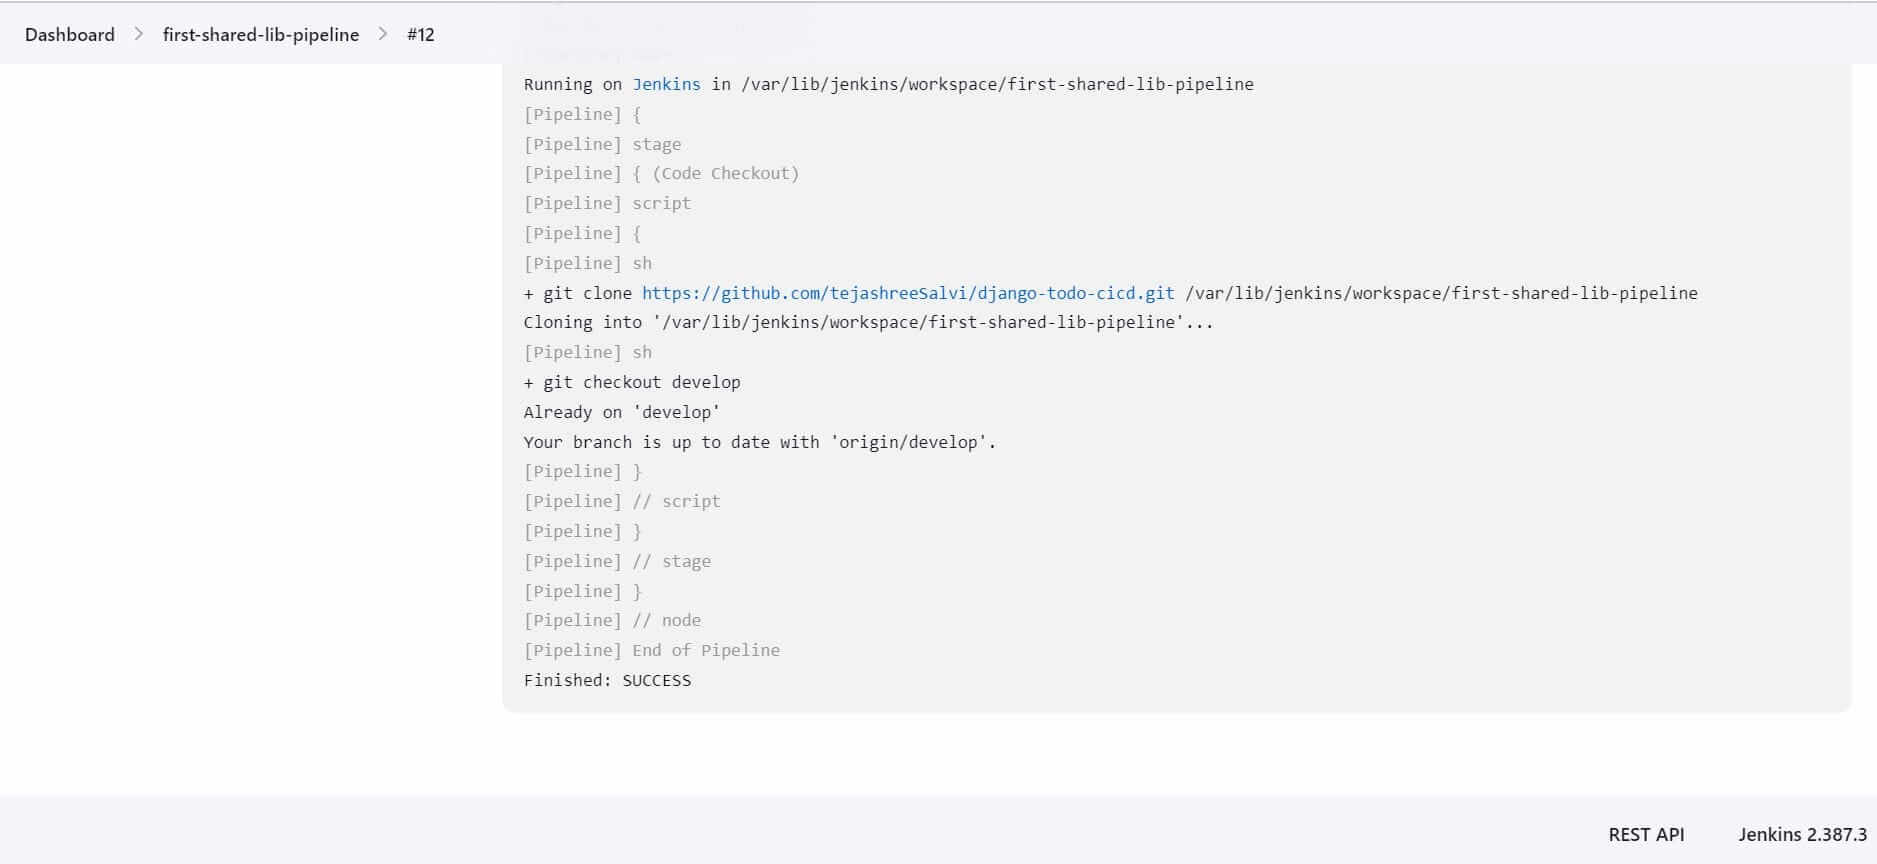
By using the shared library and calling the checkoutCode function, this pipeline script performs a code checkout operation by cloning the specified repository and switching to the develop branch.Hurray! We have created our first reusable code using Shared Library.When to use and When to not use Shared Library.
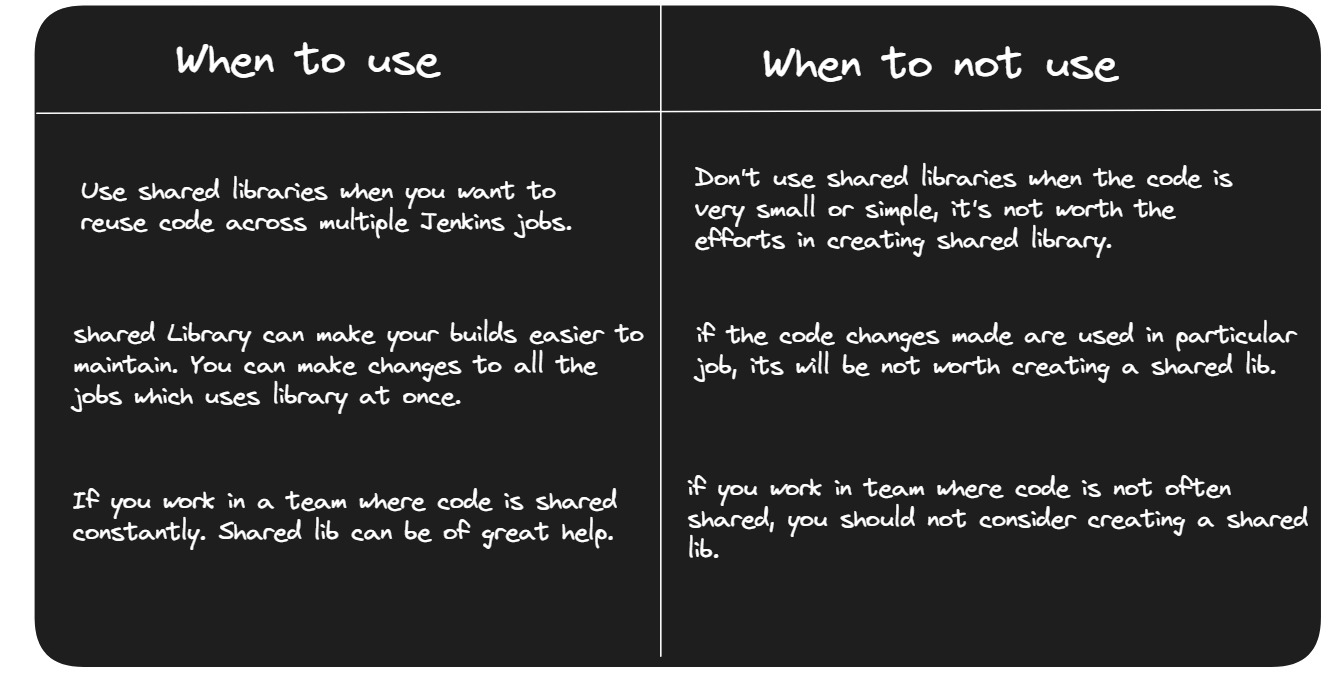
That’s it! We have learned basics about Shared Library. Hope you will use it in your next project.Pre-requisites Install Jenkins
.svg)


.svg)